Showing posts with label Heather Valentin. Show all posts

Friday, April 1, 2016

Some Autumn and Winter Copic Coloring

Happy Friday to everyone! I wanted to share some Lacy Sunshine coloring that I just finished. I hope to have these two made into a couple of art cards.

One of my favorite Lacy Sunshine characters (and I have a lot of favorites) are the beauties in Heather Valentin’s Melancholy Moppet line. This first one is Jocelyn Autumn Stroll. I know it’s not fall, or winter for that matter, in the United States, but this one told me that I needed to relax and color, so that’s what I did.
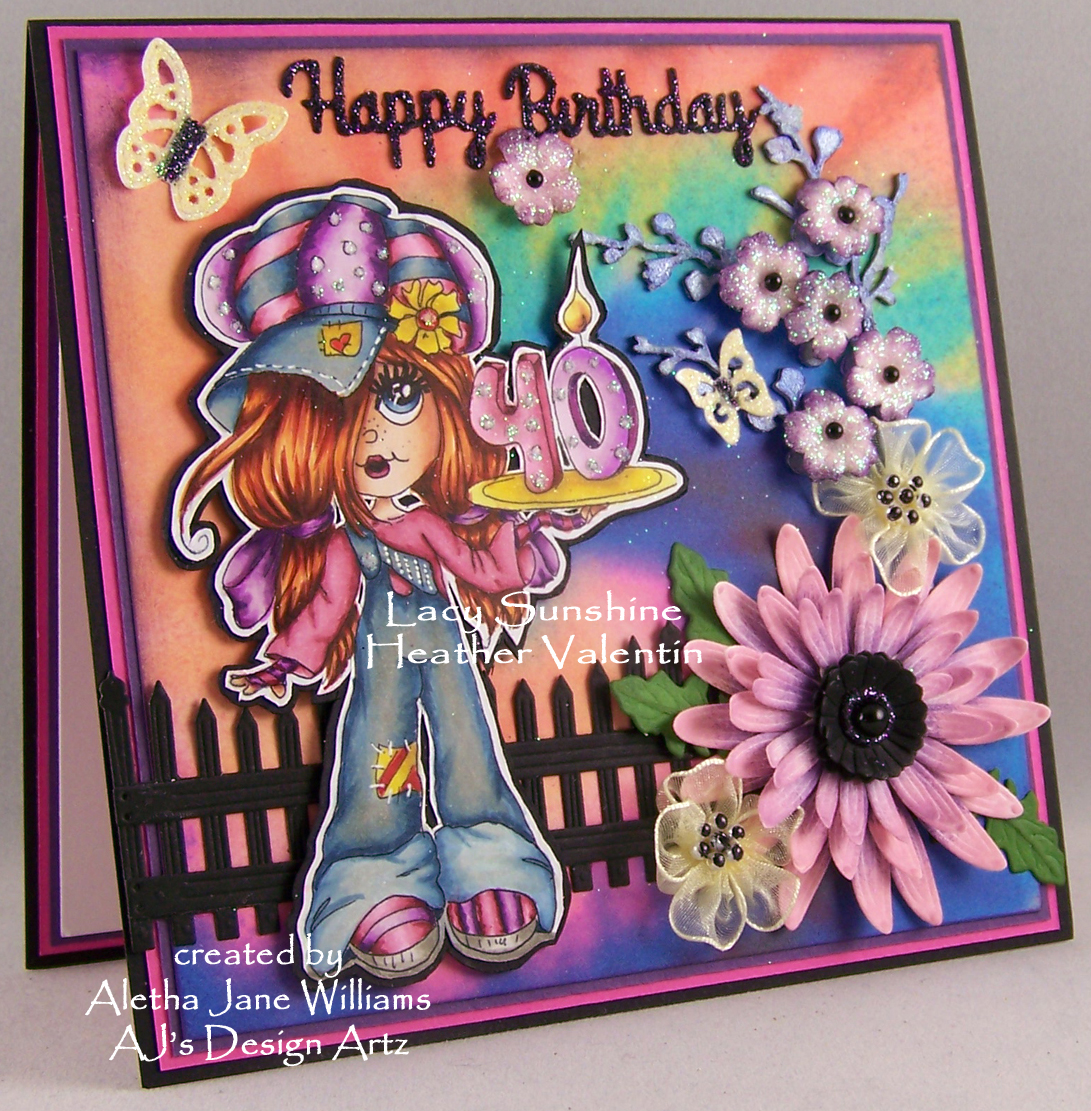
Melancholy Moppet

 The Copics and other media used for Jocelyn are as follows:


This next one is also part of Heather’s Melancholy Moppets, Winter Octavia.

The Copics and other media used for Octavia are:

Did you know that there are coloring classes, taught by Heather? Heather has such a unique and amazing style with colors. I am very anxious to start on these classes. I have taken other coloring classes, and if more come up, I will enroll in those too. My goal is to combine what I have learned and finally find my own style of coloring. With Heather’s classes I know that I will be reaching that goal. Heather teaches with videos, online exercises, and provides free digital images for each “themed” class. You will be able to learn at your own pace and share what you are learning with Heather’s students within the closed Lacy Sunshine Facebook Art Forum. Please click here for Heather Valentin’s Online Art Classes. Looking forward to seeing you there.

Other venues to find Lacy Sunshine:
Lacy Sunshine Color and Craft Facebook public group;

Thanks for stopping by and I hope to see your art very soon. If you have any questions, please contact me.
Aletha Jane

Saturday, December 5, 2015

Angel Kisses for the Winter Holidays


Happy Saturday! I feel blessed to have found the time to get this project completed. It has been a very busy two months for me with family and health. I think that things are going to get a little easier for the remainder of the year. 2016 is almost here, so I thought this project would make a very special last piece for 2015. I do Copic coloring and some drawing when I need some time for relaxation (it also helps with depression). When it comes to getting in my studio and I am able to finish projects, that’s icing on the cake.

This past week I have created a holiday card with my very first Lacy Sunshine’s Candy Box. Heather Valentin, owner/artist of Lacy Sunshine, developed several kinds of crafty “Candy Boxes” for purchase. Within those candy boxes are enough supplies to make several projects, cards (designer papers, Lacy Sunshine glitters, flowers, feathers, several ribbon styles, embellishments, die cuts), etc., and you also receive an exclusive digital image with your purchase.


My project used the exclusive image mentioned above. This image is an addition, but exclusive, to Heather’s Angel Kisses line. This Angel Kisses name is “Snowflakes of Love.” Remember I said exclusive. “Snowflakes of Love” has been colored with Copics. After the coloring was complete, I trimmed her with Spellbinder’s Rectangles Grand Nestabilities. (Spellbinders has stopped manufacturing the Grands. I am so glad that I have the ones that I do have. I use them a lot in my mixed-media projects.) I distressed the edges and the surrounding white area with Hazelnut Blend ink (links are below) and then added the Frantage. I am still trying to get the hang of Frantage. I have seen some amazing pieces of art with this medium added. I look forward to the day that I have mastered it.


Heather included a green glitter paper pine needles die that was used at the bottom of my background. One of the designer papers that Heather included was a beautiful bronze handmade paper. With this paper I did some die cutting with the corner die from the Draping Vines Elements set. I cut the corner die four times and added them to the corners. The snowflakes are from the Create a Flake Six die and covered with the Distress Vintage Platinum Glitter Dust. This is the first time that I have created with this glitter dust and it will not be the last. It has amazing “shine” qualities that you do not find in the other Distress glitters.

As you can tell I was able to use a lot of the supplies that came in my candy box, but not all of them. With the remainder of the candy box supplies, I have enough for a couple more creative endeavors. 


“Snowflakes of Love” will be entered in the following challenges:
A Gem of a Challenge – Christmas Anything Goes
Brown Sugar Challenge – Anything Goes
Cardz 4 Galz – Vintage Christmas

Thanks so much for stopping by. If you have any questions, please contact me. I am wishing everyone a very merry Christmas and the happiest of holidays.
Aletha Jane

Tuesday, August 4, 2015

My Darling Daughter Turned 40!


I guess that would make me at least 21 years older. LOL Anyway, she is the one who had the 40th birthday. With that said, I created her a very special art card for her fortieth year of life.

My daughter Heidi has caught the Copic bug and I have been giving her a few Copic pointers. In this process, she fell in love with Heather Valentin’s (Lacy Sunshine) images. Her favorite character, out of all of Heather’s original characters, is Rory. I asked Heather if she could create a Rory with the numeral “40,” and this is what she came up with. Heather’s imagination is wonderful, original, and amazing. 


Copics are the first medium of choice, for me anyway, for coloring any Lacy Sunshine images. As you will be able to tell, Heidi’s favorite colors are pink and purple.

I will not take you through my whole creative process, but I will show you a few pictures showcasing some new Sunshine glitters and a few Spellbinder’s dies.

The picture above is the best showing of Heather’s glitters. The mini flowers were some extras that I had in my pile. Before adding the glitter I brushed on some Fun Stampers Journey (FSJ) Deep Lilac True Color Fusion Ink to the ends of each petal. The glitter on the flowers is Frosted Snow from Heather’s Sunshine Iced Pastels Kit. Look at that sparkle!!!  For the final touch for the flowers, I added some black flat-backed pearls to the center. The butterfly is from Tattered Lace Butterflies and I sprinkled Heather’s Frosted Lemon Drop, also from the Sunshine Iced Pastels Kit. The butterfly’s body is covered with Sunshine Blackberry glitter. My sentiment, Happy Birthday, was die cut from FSJ Black Licorice cardstock with Spellbinder’s die Sentiments 3. Can you see the branch that the flowers are attached? That is a stray chipboard piece that I coated with white gesso. When that was dry I sprayed with one of Heather’s new line of paints, Sweet Lilac Shimmer. I wish that my camera could pick up the shimmer. Believe me it is a’ shimmerin’.


In this picture (above) shows my Gerber Daisy. I am having a lot of fun with Spellbinder’s “create” a flower die series. This Gerber Daisy was cut from FSJ Bubble Gum cardstock. Before my assembly of the daisy, I sponged on some FSJ Pretty Pansy ink on each petal center. After the assembly was completed I added a black flat-backed pearl to the center and some of Heather’s Blackberry glitter. Even as dark as that center is, you can still see the entire blackberry sparkle.


And now for the completed project…this is a 6” square art card. The base is trimmed from a 12” square of FSJ Black Licorice cardstock, folded for a finished 6” square card. My bottom two layers are trimmed from FSJ Watermelon Fusion and Deep Lilac cardstock. The background, which pulls it all together, is trimmed from Heather’s Tie Dye Swirls digital paper kit.


Did you know…?

We have a Lacy Sunshine Blog Challenge every two weeks. This is a “loyalty” challenge blog that I know you would be thrilled to be a part of. We also have another challenge going on at the Lacy Sunshine blog and you will get to see the Lacy Sunshine Creative Team showcasing their remarkable project.  Lacy Sunshine Facebook group. You will find a challenge just around any corner to win you some Lacy Sunshine goodness.
You are also invited to join our

Thanks for stopping by! If you have any questions, just contact me.
Aletha Jane

Friday, March 27, 2015

Lacy Sunshine Time


Welcome to Friday, the last day before the weekend! I hope you have wonderful plans made.

I have a Goth project for you today. I would like to introduce you to Crimson Bleeding Heart, just one of Heather Valentin’s Ethereal Enchantress line. Heather gave her LS Creative Designers a theme of “March Winds Blow” for our March postings. I really wanted to do something with Crimson so my story is: "Oklahoma’s March winds blew in this beautiful enchantress and she landed on my Dogwood tree." Oh well, I am not the writer. I usually leave that chore to my husband.

I always start with coloring my images and this time around was no different. Copics are my choice of medium. I also used Pan Pastels in Permanent Red Shade and Neutral Gray Shade for the background.


Copics used:
Skin: E000, 00, 04, 11, 21, R20;
Hair: R20, 21, 22, 24, 27, 29, 89, and
C00, 1, 3, 5, 7, 9, 100 Black;
Blouse and Slippers: C00, 1, 3, 5, 7, 9;
Tutu: R20, 21, 22, 24, 27, 29, 89;
Inside of Wings: C3, 5, 7, and
R22, 27, 89;
Wings Rim: C3, 5, 7, 9;
Limb: E21, 25, 29
Underneath Wings: C3, R22.

The rest of my recipe is:
Ink: Fun Stampers Journey (FSJ) Black Licorice hybrid ink;
Cardstock: FSJ Black Licorice and Pomegranate Splash;
Designer Paper: My stash;
Dies: Spellbinders Heartfelt Creations Romantic Garden;
Stickles: Ranger Distress Stickles Barn Door;
Adhesives: FSJ Glaze and Foam Squares.


In the photo below, you will see some dimension on the Bleeding Heart blooms. I die cut the bleeding hearts die eight times in the FSJ Pomegranate Splash cardstock. For the first layer I distress the edges with my black ink and glued those down flat. For the top layer, I distressed the edges with black ink and added a thin line of glue to the back middle of the bloom. After the last layers were dry I added the Barn Door Stickles and folded the bloom edges up for dimension.


I hope you come and play in the Lacy Sunshine Challenge blog. We would love for you to visit our Lacy Sunshine Facebook group and share with us your Lacy Sunshine art.

Thanks for stopping by! If you have any questions, please contact me. Have a wonderful and creative weekend.
Aletha Jane
Lacy Sunshine Creative Designer

Tuesday, August 5, 2014

Heather Valentin’s Petals at Sweet Pea Stamps


I have a little Sweet Pea Stamps inspiration piece for you today featuring Lacy Sunshine's Heather Valentin’s Petals. Isn’t she a little charmer? A card featuring Petals would be perfect for a little flower girl. I know that she would appreciate the cuteness. Petals can be found as a digital image or as a rubber stamp, whichever you prefer, at Sweet Peas.

I am in love with Heather’s art work. Did you know that the Heather’s images on Sweet Pea Stamps are designed exclusively for Sweet Peas? I think that is pretty cool!


Petals was first colored with Copics and then trimmed with a die. I then layered her on three layers of purple and light purple cardstock. Before layering I did add some Smooch Illuminate ink to the embossed edges.

Copics used:
Skin: E000, 00, 04, 11, 21, and R20
Hair and Basket: E25, 29, 31, 50
Eyes and Leaves: G40, 43, 46, 29
Pinafore and some flowers: V000, 01, 04, 06, 09
Other flowers: RV34, 52, 69
Dress: V000, RV34, 52, and C0, 2, 4
Dress sleeves: C4, 6, 8
Background: W00, 0, 01, 2, 4, and RV52

Other elements for my Petals project:


Petals would like to be entered in the following challenges:
Everybody-Art-Challenge – Favorite Stamp
Love to Create – Anything Goes 


I wanted to remind you all of our Sweet Pea monthly challenge at One Sweet Challenge. There are fantastic prizes there. Over at our Sweet Pea Stamps Facebook group, we have a bi-weekly art contest. That prize is one digi stamp from the Sweet Pea Stamps store. You must use a Sweet Pea image, the theme is always “Anything Goes,” and you can enter as many times as you want. Each entry MUST be a new project. How easy is that? For all the upcoming events and sales visit our Sweet Pea Facebook page.

Thanks for stopping by today. If you have any questions, please contact me.
Aletha Jane

Thursday, July 24, 2014

Molly’s Gone Fishin’


Happy Thursday to everyone out in cyber space. This little post is going to be doing double duty. I am representing Sweet Pea Stamps and Lacy Sunshine.  I have a very special project for you today creating with Heather Valentine’s, owner, artist, and illustrator for Lacy Sunshine, Molly Gone Fishin’ digital image. Heather has a line of red rubber stamps and digital images exclusively through Sweet Pea Stamps, and only through Sweet Pea.


For my cute little Molly (Do you think she is playing hooky?) I colored her with Copics and trimmed the colored image. I then layered her with two colors of cardstock.

Copics used:
Skin:
E000, 00, 04, 11, 21, & R20
Hair, stump, & pole:
E25, 29, 31, 50
Grass, pants, & eyes:
YG61, 63, 67, & G29
Shirt & bows:
Y11, 14, 15, 18, 19, 32
Fish:
B12, 14, 16, 18, and
YR21, 24, 27
Water:
B12, 16, 18
Background;
W00, 0, 1, 2, and
B12, Y18


To complete my piece I trimmed the designer paper and layered that with two colors of cardstock. Before attaching this to the card base I added thin grosgrain ribbon for the two corners. I added several Cheery Lynn dies for the flowers and the butterfly. After attaching these to my card I added some Liquid Pearls to the centers and the body of the butterfly.

My complete recipe:

Molly would love to be entered into the following challenges:
Moving Along with the Times: Color Challenge

I would love to invite you to our Sweet Pea Stamps Facebook Group. We have a bi-weekly art contest using Sweet Pea’s images. Check out our monthly One Sweet Challenge. July’s theme is red, white, and blue.

Want some more fun? I want to invite you to our Lacy Sunshine Facebook group. Heather has lots of little contests that go on all the time. We also have a Lacy Sunshine Challenge Blog. This is a progressive challenge, so I know you will want to check that out.

Thanks for stopping by.  If you have any questions, please contact me
Aletha Jane

Sunday, October 27, 2013

Curly Sue’s Victorian Christmas with a new Lacy Sunshine Challenge

Happy Sunday! I hope that you all have had a wonderful weekend. And what a wonderful way to end your weekend…a new challenge at LacySunshine. This will be our 20th challenge, and the theme is “Deck the Halls.” Perfect timing, I’m ready to create a little holiday cheer.


For my little project I was given “Curly Sue Victorian Christmas” to create a project. Of course, I chose a card, but a Christmas card. I know the theme is “deck the halls” but this is what came out of my brain. So now I can say, “Curly Sue finished all her decking the halls and is now out for a winter stroll.” Isn’t she just darling? And all those curls are to die for! You can find “Curly Sue Victorian Christmas” in the Lacy Sunshine shop under the “Seasonal Digis” category.


I have colored her with Copics and accented a little with Spica and Wink of Stella pens. I distressed the edges and added Gather Twigs Distress Ink to the edges. I layered Curly Sue with Stampin’ Up!’s Cherry Cobbler and Always Artichoke cardstock. I distressed those edges the same way.

Copics used:
Skin: E000, 00, 11, R02, 20
Hair: Y21, E39, 59, 97, 99
Coast, Hat, & Eyes: G21, 24, 29
Dress & Poinsettias: R81, 83, 85, 89
Piping: Y11, 15, 17
Background: W0, 1, 2, 3, 4, Y11

My designer paper is from my stash (probably purchased at Hobby Lobby), layered again with cherry cobbler and always artichoke, and distressed all edges. Before I placed my background to the card base I centered some cotton lace from Really Reasonable Ribbon.


Now it’s time for the embellishments. First I cut some poinsettias with Spellbinder’s Layered Poinsettia die, embossed, and then highlight the embossed areas with Brilliance Galaxy Gold. All of my sprigs are from Spellbinder’s Die D-Lutes Corner Sprigs. I am really enjoying these tiny dies. After the cutting and embossing, I sponged on some Viva Décor Metallic Moss Green Stamp Paint. This paint has so much sparkle, and I like sparkle.


I hope that you do enter our Lacy Sunshine challenge, and if you use a Lacy Sunshine image, please come share it in our Lacy Sunshine Facebook Group.

That’s it for today. Come back tomorrow for more Christmas spirit goodness. This little piece of art is now in my Zibbet online shop. If you have any questions, please don’t hesitate contacting me.
Aletha Jane

Saturday, October 26, 2013

A Victorian Winter with Lacy Sunshine


Welcome to Saturday and to my blog. I hope that everyone’s weekend has started out good.

My post today is my first post as part of the Creative Team at Lacy Sunshine. I was so intrigued with what she is trying to accomplish with her blog, Lacy Sunshine, that I asked if I could be part of this new journey. Her response was, “Come on aboard.” There is a lot happening in the Lacy Sunshine realm. I am sure that you will be hearing about some new adventures for Heather coming soon.


I created a 5¾” square card with the beautiful image Victorian Winter Emily. Isn't she gorgeous? She was also a lot of fun to color with Copics. After the coloring was finished, I trimmed her down and distressed the edges with Gathered Twigs Distress Ink. She was then layered with Stampin’Up!’s cardstock in Cherry Cobbler (my new favorite red) and Always Artichoke, perfect colors for the traditional Christmas.

Copics used:
Skin: E000, 00, 11, R02, 20
Hairy: YR21, E15, 13, 18
Dress, Coat, & Hat: R22, 43, 46, 56, 59
Bow, Umbrella, Leaves, & Eyes: G21, 24, 29
Fur Trim & Muff: W0, 1, 2
Background: W0, 1, 2, 3, 4

Now the second stage of the fun starts, all the embellishments. My designer paper is from my stash and that was layered with Cherry Cobbler and Always Artichoke cardstock. I found some vintage lace in my overflowing ribbon drawer that was perfect for a Victorian theme. I placed that under Emily, but before Emily was place on the card, I die cut some corners in Cheery Cobbler cardstock using Spellbinder’s Die D-Lite Corner Flourish. I sponged some Gathered Twigs Distress Ink on the embossed areas of the die and then released it.


I wanted some kind of flower(s) on my project, but not poinsettias. I rather like the way the flowers that I chose to make turned out. I used two Spellbinder’s Die D-Lite, Blooms One and Blooms Three. As you can tell, I am loving these new little Spellbinder’s Die D-Lites, perfect size for smaller projects.  After my die-cutting was complete, I painted each cut with Viva Décor 3-D Stamp Paint in Metallic Carmine Red and Metallic Moss Green. These paints have the most amazing sparkle, and I like sparkle. I then shaped each petal with McGill’s Tool Kit and Molding Mat. I am finding myself using the tool kit every day.


You still have a few hours to enter our Lacy Sunshine FallColors challenge. If you miss this one, there is another challenge that starts tomorrow. That theme is…? I can’t tell you right now. You will have to visit the blog and find out. We would love if you shared your little pieces of art using a Lacy Sunshine image at our Lacy Sunshine Facebook group.

Thanks for stopping by! If you have any questions, don’t hesitate contacting me.  My project today will be available for purchase in my Zibbet shop. Come back tomorrow, I will have some more Lacy Sunshine for you.
Aletha Jane


Sunday, September 29, 2013

Trick or Treat at Lacy Sunshine's Digs


We have a fun one for you this time around! Well, really, all the challenges are fun but this one is perfect for the season that is going to be upon us very quickly. Our Lacy Sunshine challenge is “Trick or Treat with Stitching, Faux or Real.” See, FUN, FUN, FUN, FUN!

For my project I was given the cutest little Lacy Sunshine digi, “Eleanor & Pickles, Ve Vant Candy.” I think that Heather knew that I usually do stand-alone images, or maybe not, and that’s why I got this one. She challenged me, or I challenged myself, whichever. But I was challenged, and I’ve got to say that I loved coloring this little duo. When I can color green hair, I am always game. You can find Eleanor & Pickles in Heather’s Seasonal section.


I did print the image twice. I like to have a backdrop of the image, and then a fussy cut image to pop up from that backdrop. They were first colored with Copics, and a few highlights with Spicas and a white gel pen were added. The backdrop was colored and cut with Spellbinder’s Labels 23.

Copics used:
Skins: E000, 11, BV000
Hair, Eyes, & Pickles:
YG61, 63, 67
Bow, Shoes & Pickles Eyes:
YG21, 23, 25, 67
Dress, Sleeves, & Socks:
YR00, 12, 14, 18;
V000, 09, 12, 15, 17
Pumpkin & Glasses:
YR00, 12, 14, 18


Eleanor & Pickles was mounted on two more Labels 23 cuts with Stampin’ Up!’s cardstock in Marigold Morning and Crumb Cake. My faux stitching was done around the embossed areas of the die cuts. I had some chipboard bats that I added. I also added some Memory Box Bunch of Bats (available in the Lacy Sunshine shop) die cuts to fill in some of the empty space. You would not believe how much I am using this little die. “Ve Vant Candy” was computer generated and added after everything was assembled.


There will be an image available for you to use for this challenge. All the details will be in the Lacy Sunshine challenge blog. After you have created your little piece of art for our Trick or Treat challenge, please stop by our Lacy Sunshine Facebook group and share it with us.

Thanks for dropping by! If you have any questions, please don’t hesitate asking.
Aletha Jane

I'm Moving!

I am moving my blog to my website at AJ's Design Artz . I hope you stop by!