Showing posts with label greetingcard. Show all posts

Friday, September 1, 2017

Believe in the Magic of Christmas and the Winter Season


To all that are going to have a three day weekend, enjoy! I also hope that all artists and crafters get a little time for creativity!

The following project has no design teams attached to it. I really needed to see how I would do “out of my comfort zone”, meaning my comfort zone is all about the coloring and making small pieces of art. I really enjoyed this process. I made a mess, but hey, it was worth it.

This post is going to be very photo heavy. I was trying to get every step that I took in this process. So, let’s get started.
Photo one above shows the end product of attaching the black cardstock to a 5½” white square card base. Before I attached the red glitter cardstock to the black layer, I die cut an ornament shape.


Photo two above shows the die cut ornament layer, cut out of gold mirror cardstock, embedded in the black ornament area. I have ordered the other ornament inlays. I must say that they are all beautiful. Notice the gold glitter sides? Well, I positioned the red on the black crooked. Washing tape to the rescue!


Photo three above is the finished card, but flat. I cut the detailed ornament out a second time in the red glitter cardstock. This allowed me to make the Cardinal red. The “believe” sentiment was designed by K Werner Designs for Simon Says Stamp. It is gorgeous. The “believe die” was cut three times in black and once in gold mirror cardstock. I glued all pieces with paper adhesive; the top layer is the gold mirror cardstock. See those two hearts? I got them from one of Spellbinders card kits. Spellbinders' monthly kits are amazing and you get a lot for the price point.


The finished piece! This will soon be in my Zibbet and ArtFire shops. You can also click within my website, AJ’s Design Artz, and it will take you to my Zibbet shop.

Challenges for Believe are:
613 Avenue Create – Anything Goes w/ Shabby Chic twist
Crafting by Designs – September Anything Goes
Simon Says Wednesday Blog – Anything Goes

Thanks for stopping by! If you have any question, please contact me.
Aletha Jane


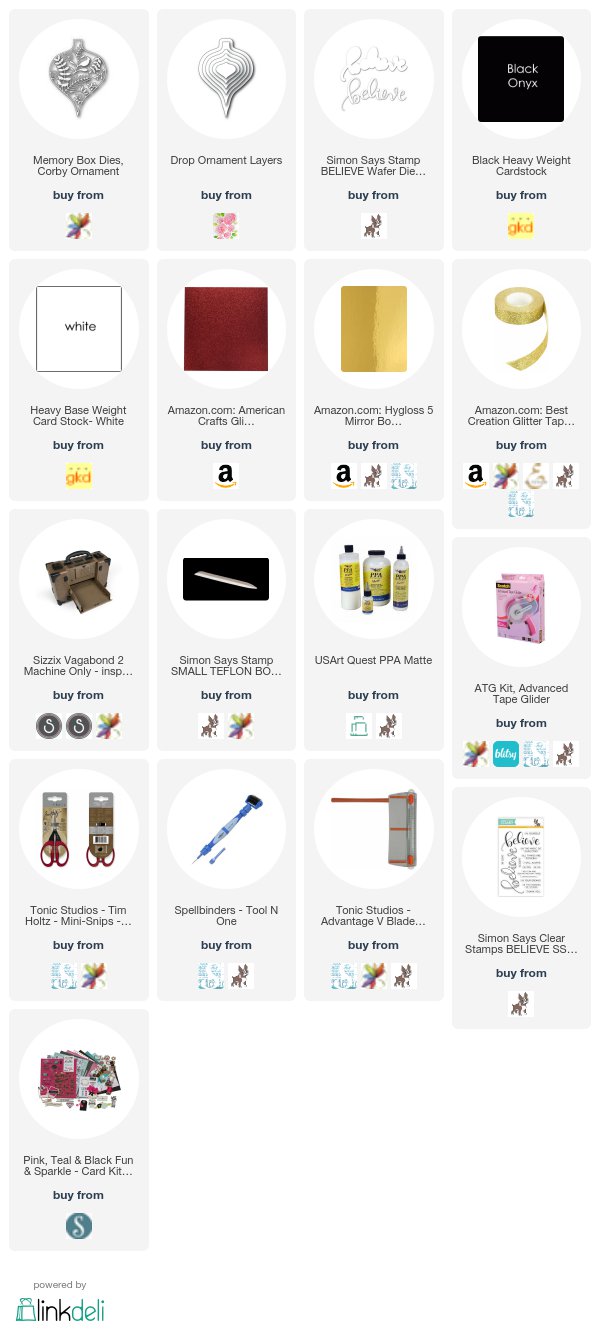
Some affiliated links are listed below at no cost to you. The supplies for making this project were purchased by me, but if you click on the pics below and make a purchase, I get a small commission. I want to thank everyone for their continued support of my art.
Tuesday, September 27, 2016

A Happy Birthday Rose

Yippee!!! This is my fifth post for September.


I have had this one completed for a while now, so it was high time that I posted. This project was the first time I watercolored with Distress Inks. I am now in love with the medium!

The white embossing and finishing with watercolors are a lot of fun. I first saw this via a few YouTube channels. Those channels are Jennifer McGuire Ink and The Gard Grotto. Both these ladies show their very artistic style in their videos. I am sure they would both love if you subscribed. You will not regret it.


On to my birthday card…I first stamped on watercolor paper with Versa Mark and embossed in white. After that cooled, I completed the watercoloring with Distress Inks. I used the mini Distress Inks, which are the perfect size.  After the drying I stamped the greeting with Archival ink and trimmed the main panel. I sponged ink around the edges for a finished look, added blue cardstock to the front of the card, glued the main panel with fun foam for dimension, attached that to the front of the card, and added sequins and Wink of Stella for the finished touches.


The list of supplies with links are:
Watercolor stock: Ranger
Embossing ink: Versamark and WOW White
Distress inks: Rose: Spun Sugar, Bard Door, Aged Mahogany,
Dusty Concord; Leaves: Shabby Shutters, Peeled Paint,
Forest Moss; Background: Stormy Sky, Chipped Sapphire
Cardstock: Fun Stampers Journey Huckleberry Fusion
Other:
White Fun Foam for dimension
(This also helps keep the card safe during shipping.)

A Happy Birthday Rose will be entered in:
Sunny Things Crafting – Anything Goes
Craft Your Passion – Anything Goes

So glad you all dropped by! If you have any questions, please contact me.
Aletha Jane

Thursday, September 22, 2016

Happy Fall with the Colors of Autumn

My fourth one for September!!! I’ve got one more to post for this month. After that one, I need to start coloring and creating for future projects

My A2 card was fun to add all the color. I love the colors of autumn. I wish it would last a little longer, perfect temperatures and perfect colors.


My image and sentiment were a “no-brainer” for me to use Copics. I really like to color pumpkins because the colors get me in the fall mood. First step was to die cut the main panel with a rectangle die. I stamped the pumpkins and the sentiment with Copic friendly ink, and the coloring began. After the Copic coloring was complete I used distress inks and added splatters from a brown glitter marker. After everything was dry I mounted the panel, after adding some fun foam to the back for dimension, to an A2 base. Another clean and simple card is complete.


Copic markers used:
Sunflower: Y13, 15, 18, 23, 28, +YR16;
Pumpkins: YR00, 02, 12, 15, 16, 18, +
E08, 09, 59;
Stems: YG93, 97, + E13, 31;
Leaves: E08, 13, 19, 31, 37, 57, +
YR20, 24 +YG95, 97;
Grounding: W1, 2, 4.

Other supplies:
Stamps: Gina K Designs Always Autumn set and
sentiment from the Painted Autumn kit;
Distress Inks: Vintage Photo, Orange Marmalade, Gathered Twigs;
Glitter Brush: Wink of Stella Brown;
Cardstock and Envelope: Gina K Design’s Dark Sage base weight
cardstock and Dark Sage A2 envelope;


Happy Fall will be entered in the following challenges:
Stamp TV - Favorite techniques (login is required)
4 Crafty Chicks - Fall Colors
C.R.A.F.T. Challenge - Autumn, Thanksgiving, Halloween
a punch or die (login is required)
Inspiration Destination – Anything goes

If you have any questions, please do not hesitate contacting me. Until next time…
Aletha Jane

Friday, March 13, 2015

A Thank You Card


Many of you knew that I had a lung biopsy last October. The good report was that the spot was benign, but in the process of the needle biopsy my lung collapsed. All is well now, but at that time I did have to spend three days in the hospital while the lung was re-inflating. I received a beautiful bouquet of roses from my husband’s office and I wanted to send them a very special “Thank You” card.

I really did not want the design to be too humdrum, but I did want it to make a statement. My selection of colors was easy, why not my favorite color purple? Fun Stampers Journey  (FSJ) has beautiful purple cardstock and hybrid inks to fit the bill. I chose to make a 5½” square card.


The first step was to cut FSJ Whip Cream cardstock to 5½” X 11”, and folded that to make the square card base. My four top layers are made with FSJ Pretty Amethyst, Deep Lilac, and Whip Cream cardstocks. I put these layers together and added the Rhttp://www.reasonableribbon.com/eally Reasonable Ribbon purple ribbon to these layered pieces and added that to my card front.


The FSJ stamp set that I created my layered daisy with is Daisy Blooms. For the rubber stamping I used Whip Cream cardstock with FSJ True Fusion inks in Pretty Pansy and Lavender Fusion. Our ink colors and cardstock match perfectly. After all the stamping was done, I matched the FSJ Daisy Blooms Die with my stamped images and and completed the cutting with the Journey Die Cutting Machine. The other layers for my daisy are cut with the Daisy Blooms Die and in the cardstocks of Pretty Amethyst and Deep Lilac.

I always finish the insides of my cards and this one is no different. Just a warning, these extra layers do make the cards heavier than normal, but it is worth the effort and the extra postage. I used the same FSJ cardstocks as I did for the front. For my “Thank You” sentiment I stamped the “Thank You” from the FSJ “Sweet You” stamp set in FSJ Whip Cream die ink on the Deep Lilac cardstock. That was cut with an Heirloom Rectangle die from Spellbinders.


My purple Thank You card will be entered in the following challenges:
 Really Reasonable Ribbon - Flowers and Ribbon
Aud Sentiment Challenge - Use a Two Word Sentiment

I guess by now you can tell I am a Coach for Fun Stampers Journey. If you need any product, i.e. dies, cardstock, stamps, embellishments, etc., you can purchase these from me. Please click here to take you to my Fun Stampers Journey web site.

Are you interested in a little more income for your household? Why not join my team of Fun Stampers Journey Coaches?  The enrollment information is available on my Fun Stampers Journey site. There are three business kits that you can order to become part of my team. They range from $69.99 to $199.99. This is an amazing incentive. Believe me when I say this is so much fun and you get to meet so many new people. I should be having a virtual Fun Stampers Journey party very soon. I want to invite you to my Facebook FSJ group, AJ’s Stampers Journey. This is the place where you can keep up with all things Fun Stampers Journey.

Thanks for stopping by. If you have any questions, please contact me.
Aletha Jane

Saturday, March 15, 2014

Sweet Pea Tilda


I have finally been able to get a little breathing room to be able to create. My studio and my blog have been very lonesome. I’ve been going through some pulmonary rehab for the past couple of months and I had to lay off some of my design team duties. Over the next few months it will be makeup time for me.

To start off I decided to create with one of my favorite Magnolia stamps, Sweet Pea Tilda. This stamp is available at StampingScrapping. There’s a lot that’s available at Stamping Scrapping, not just Magnolia stamps. In fact, I purchase most of my supplies here. If Cindy does not have it, I bet ‘cha she can get it for ya'.

On to my little piece of art! Sweet Pea Tilda was colored with Copics. After I completed the coloring, I then die cut her with one of Cindy Echtinaw’s Spellbinder’s Card Creator Dies, Fancy Postage Edge. She was then mounted on Stampin’ Up! cardstock in Certain Celery and Bravo Burgundy.

Copic colors:
Skin: E000, 00, 11, R02, 20
Hair: Y21, 26, E37, 50, YR24
Leaves: G40, 82, 94, 99
Hat, Dress, & Shoes: V91, 93, 95, 99
Background: W000, 0, 1, 2, V91

Other supplies:
Gathered Twigs Distress Ink
Floral Corner 1 Spellbinder’s Die D-Lites
Vintage tatting – my stash
A Beautiful Life DP from My Mind’s Eye


Challenges that Sweet Pea Tilda would like to enter:
A Vintage Journey – Anything Tim Holtz (I used DI)
Scrapping4Fun – Flowers
Stampin’ For the Weekend – Anything Goes

That’s it for this rainy Oklahoma Saturday. If you have any questions, please contact me.
Aletha Jane

Friday, November 1, 2013

Monster Family Reunion at Silly Dilly Beans


A new challenge for you at one of your favorite stops, Dilly Beans Friday Challenges! This week we want to see your fall colors in all their glory. You must us a Dilly Bean’s image to be able to participate and win your choice of three Dilly Beans images.


For my little project I decided to create an A2 size card. I rather enjoyed working in this size. It was a clean and simple style for me this week. The digi I chose is a new one in Megan’s shop, Monster Family Reunion. Aren’t they fun? I enjoyed deciding which one would get what fall color. I colored this image with Copics and layered it with Stampin’ Up!’s Really Rust and Early Espresso cardstocks.

Copics used:
Monsters:
G21, 28, 29
RV63, 66, 69
YR61, 65, 68
Candy Corn: Y0000, 11, 13, 15, 17, and
YR000, 12, 15, 16, 18
Hair: C00, 1, 3, 5, 7, 9
Eyes & Background: W00, 0, 1, 2, 3

My designer paper is Best Creation Inc. Hello Fall collection. I hope that I can find more of this. I have used most of the pack, perfect fall colors with glitter.


The only die cut that I used is Spellbinder’s Card Creator A2 Fancy Ribbon Threader. I have no ribbon threaded, but I did thread a strip of designer paper cut down to a little under ½”. I think that it goes perfect with the Monsters.


I hope you enter our Fall Colors challenge this week. After you do, or if you use a Dilly Beans image in your art work, please come share it with us at our Dilly Bean’s Facebook page.

Thanks for stopping by. If you have any questions, please don’t hesitate contacting me.
Aletha Jane


Tuesday, June 25, 2013

Olivia and Peter at Sweet Peas


Well…I am now one week late on posting this. I really forgot to post it on my personal blog. I am ashamed, because I have wanted to be on this amazing design team for Sweet Pea Stamps.  I made it, and I messed up.  I have had too many doctor appointments and I thought I was very organized in all the chaos. Chaos fooled me again.

It was my turn, one week ago, for a showcase piece at Sweet Pea Stamps. I would like for you to meet Olivia and Peter from Norma Burnell’sFairy Tangles Art Collection. I found Ms. Burnell’s art while I was surfing the web for Zentangle patterns. I fell in love with her style and I was hoping that a rubber stamp company would start the ball rolling on manufacturing the stamps. When I found out that it was Sweet Pea, I jumped for joy. 


I stamped Olivia and Peter with Memento ink on Cryogen cardstock for coloring with my Copics. After die cutting her with a die from Spellbinder’s A2 Curved Matting Basics A I distressed with Frayed Burlap.


The designer paper was a scrap. The other dies that I used were Spellbinder’s Bitty Blossoms and SCACD’s Alice’s Clock. This was distressed with white Viva Décor 3-D paint.


Don’t forget about our challenge at One Sweet Challenge. The theme is to use buttons and ribbons as embellishments. You can use any stamp you want, rubber or digi, but for the “larger” prize you must use an SPS image.

Thanks for stopping by. If you have any questions, please contact me.
Aletha Jane
SPS Design Team

I'm Moving!

I am moving my blog to my website at AJ's Design Artz . I hope you stop by!