Showing posts with label birds. Show all posts

Tuesday, August 15, 2017

Anything Goes Challenge at TTCRD


It’s that time again at Through the Craft Room Door (TTCRD) for the next weekly “anything goes” challenge. You will have until Monday, August 21, to enter our fun challenge. Our sponsor this week is Crafts and Me. They are offering a prize of £8 digi voucher.

Just a few notes about Crafts and Me
"We are a small family crafts business that came about when as a card making family, my daughters, young granddaughters, and I that is! Not our men, who do not make cards, (although my husband has had a go), could never find the stamps and crafts that we had seen advertised. So, in the end, we decided to start up “Crafts and Me”, enabling us to get the products we wanted and to offer other crafters like you.

We love the different ranges of stamps and crafts that we get from all over the world and we hope you will love them too! Our aim is to give you the best possible customer service that we can, and to treat our customers just as we would want to be treated ourselves.

Enjoy looking through our shop. If you cannot find a product you would like, or if you have any suggestions about our shop, we would love to hear from you. Email us at info@craftsanddme.co.uk; we are always looking for ways to improve our site."

Artist Jeremiah Ketner, a Chicago based artist, who tends to paint charming little creatures floating through pastel dreamscapes. His Japanese pop art imagery tends to describe the casual and carefree side of life. Jeremiah Ketner has been busy painting and exhibiting his works all over the nations.

Jeremiah’s image that I have colored is Spirals. You can purchase, at Crafts and Me, this image and others by Jeremiah, as a digital image or as an unmounted rubber stamp.

The photos below give you an idea of what I color first and the Copics I used also. I am working on a coloring video, but that will come later.

Depending on the technique, the background is what I color first.
The splotches are created with alcohol and micro-fine tip applicators. 

Skin and blush are next.
The way I color skin is lightest color first, darkest next.
My technique is E50, 04, 13, 11, 53, 51, and E50 again, blending as I go with each color.
The blush is R20 as the shade, and R11 for blending. I hope this makes sense.


Hair is my next area to tackle.
I do a lot of flicking with hair and work from light to dark.


The two photos above are the coloring of  the Jasmine, Orchids,
dove, and dress. At first her dress reminded me of bark.
I really did not want brown again, so it turned into leaves.

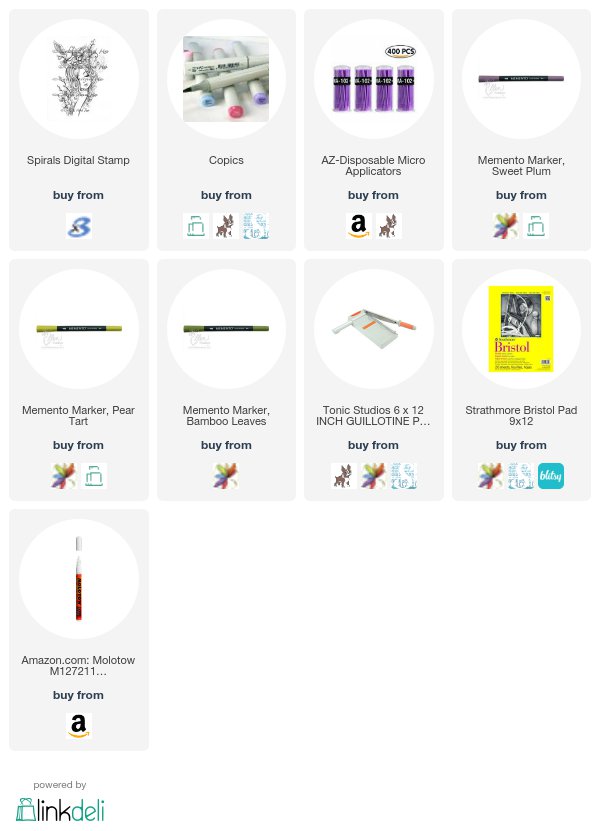
Other supplies (all links below) are Bristol Smooth 300 series for my cardstock,
accents with Memento Markers in Pear Tart, Sweet Plum, and Bamboo Leaves,
and a Molotow white pain pen for more background accents.

My finished project.

  • A reminder to all who play along with us each week: You can enter twice and both need to be new projects. No back linking allowed either. All entries must mention and have a link to Through the Craft Room Door
  • To those of you that continue to play along with us every week, thank you so much! We appreciate you sharing your creations with us and truly enjoy your talent!
  • To see how the winners and top 3 are selected click here to check the “Challenges Rules” tab. information.
  • The July/August edition of the “Through the Craft Room Door” (a short version) online magazine can be viewed HERE.
  • If you are interested in subscribing, please check HERE and click on “Magazine Subscription” tab for more information.
  • You are invited to submit your cards and projects for our September/October issue. Please check HERE and look under the “Magazine Submissions” tab for information regarding requirements or contact Sandra or Cara at TTCRDmag1@gmail.com.
  • If you are interested in becoming a Designer or Guest Designer for “Through the Craft Room Door”, please check out the link HERE for more information.
  • If you look at the top of my sidebar, you will see a sneak peek of the July/August issue of our online magazine.

I will be entering the following challenges:
Crafting by Design – Anything Goes
Stamps by Star – Hand Colored Image
613 Avenue Create – Anything Goes w/optional Shabby Chic twist

Thanks for stopping by. If you have any questions,
please contact me.
Aletha Jane


Some affiliated links are listed below at no cost to you. The supplies for making this project were purchased by me, but if you click on the pics below and make a purchase, I get a commission. I want to thank everyone for their continued support of my art.
Monday, September 22, 2014

“Oh My Little Chickadee…”

I hope everyone is having a very creative and productive week. I have been very busy with several Facebook groups and in-between that I was able to complete a project with Fun Stampers Journey (FSJ) stamps and supplies. Truth be told, I started on this last week. I am really enjoying getting back to my rubber stamps roots.


The Christmas spirit has finally grabbed me, so I decided to use the FSJ Christmas Melody set for my next rubber stamp project. There are three large stamps that make perfect images for cards. There are also a “Merry Christmas” sentiment and a gorgeous holly stamp for an extra embellishment. I chose the Chickadee image to begin my card.


Before the creative process started I stamped the chickadee with Memento Tuxedo Black ink on Copic X-press Blending Card. It was then colored with Copics and trimmed with Spellbinder’s Celebration’s Pierced Oval. After the trimming I added FSJ Kiwi Slice True Color Fusion ink around the edges for a little more pop of color.


Copics used:
Chickadee: C0, 1, 3, 5, and clear glitter pen
Branch: E25, 50
Berries: R20, 22, 27, 29, 89
Background: W00, 0, 1, 2, 3

I could not locate any designer paper that I liked with my Chickadee (As much DP that I have, I was shocked! LOL) I decided I would make my own. I searched through my ever-growing stencil stash and found just what I was looking for. This stencil is from Joggles.


My finished card was going to be finished size of 5½” square, and I knew that there would be several layers of cardstock under my DP. I trimmed some FSJ Whip Cream cardstock to 5” square and got ready to stencil. For photographing purposes I used a piece of Kiwi Slice cardstock so you could see the cardstock and stencil. I taped the white cardstock, with removable tape, to the green cardstock. The next step was to position the stencil where I wanted the image from the stencil to be.


I am ready to create the designer paper. I used a sponge dauber with FSJ Kiwi Slice True Fusion ink. I always start on the right side because I am left handed, not as messy. This was the point where I started truly appreciating FSJ’s True Fusion inks. They are a hybrid ink so they keep that same pigment intensity as a pigment ink. They are also very quick drying, so no mess.


My embellishments are red ribbon and box (from my stash) and holly corners. My holly corners (see below) were die cut from Spellbinder’s Holly Motifs in FSJ Kiwi Slice cardstock. After embossing, and before I released them from the die, I used FSJ Kiwi Slice True Fusion Ink on the embossed areas. I die cut a total of eight hollies and used two for each corner. From my stash I glued red flat-backed pearls to the center.


For the completion of my card I used 8½”x11” FSJ Kiwi Slice cardstock trimmed to 5½”x11” and folded in half to make my 5½” square card base. Next step was to take my homemade designer paper and layer that with FSJ Kiwi Slice and Candy Apple cardstock. Before attaching this to my base I added my red ribbon and bow. My Chickadee was placed on two FSJ Caddy Apple cardstock oval die cuts and placed above the bow with foam tape. The final pieces were the holly corners. Mission completed!


Before I sign off, I wanted to invite you to my Facebook group, “AJ’s Stampers Journey.” The group is still in the growing stages and I am getting ready to send out catalogs to my members. If you would like a catalog, come join my group, and then send me a PM on Facebook or email me with your mailing information.

With Fun Stampers Journey you have a business opportunity of becoming a Journey Coach. You will have exclusive access to products, product discounts, a very generous compensation plan, and the ability to create and connect with friends and family. I don’t want you to miss this amazing opportunity of becoming one of the earliest coaches within this growing and expanding company, Fun Stampers Journey.  I would be honored to have you on my team. Click http://www.funstampersjourney.com/155 for more information. After you have read all the information and you have questions, please contact me at ajsdesigns@cox.net

"Oh My Little Chickadee" would like to enter the following challenges:
Craft-Dee BowZ - Anything Goes, include a handmade bow
My Craft Creations - Anything Goes


This was a rather long post, but I hope you had reading enjoyment, and maybe picked up a few tips. Thanks for stopping by. If you have any questions, please contact me.
Aletha Jane

Friday, May 30, 2014

Delicious Doodles For the Love of Animals.


Hi all! I hope that you have had a productive and creative week. We have a new challenge waiting on you over at the Delicious Doodles Challenge blog. This week’s theme is “For the Love of Animals.”

We want to see what your interpretation is showing your love of animals. It is not a requirement to use a Delicious Doodles image, but if you do you can enter twice, doubling your chances of winning.


For my “for the love of animals” project I chose to color one of Teri’s newest images, Tropical Masquerade. This was so much fun to color with Copics. After the initial coloring, I added some gray Prismacolor pencil to the Cockatoo’s tail feathers along with a clear glitter gen pen.

Copics used:
Skin: E000, 00, 04, 11, 21, and R20
Hair: C00, 1, 3, 5, 7, 9
Cockatoo & Mask: W0, 1, 3, 5, 7, 9
Other Copics:
R20, 21, 22, 24, 27, 29, 89
V20, 22, 25, 28
BG70, 72, 75, 78
Y15 and YR15

My designer paper is Graphic 45 Couture Collection. The cardstock is Stampin’ Up’s Taken with Teal and Real Red. I have added some Spellbinder’s Feathers and added real feathers on top of those. The red bling is from my stash.


I hope that you join us for our current challenge, “for the love of animals.” If you use a Delicious Doodles image, (Why wouldn’t you?) come show us your little piece of art in our Delicious Doodles Facebook group. We would love to see it.

I hope you have a wonderful weekend. If you have any questions, please contact me.
Aletha Jane
Delicious Doodles Designer

Wednesday, October 9, 2013

Toadstool Fascination by ching-chou kuik


Happy Wednesday! This project was a dream to create. I got to use some of my favorite dies and mediums for this art card.

The digi stamp, ToadstoolFascination, designed by ching-chou kuik, is available at Sweet Pea Stamps. I loved all the detail in this little stamp, the leaves, the birds, that hair (I love coloring hair), and of course the toadstools.  This beautiful image is also available in rubber stamp form. Whether you want the digi format or the rubber stamp format, SPS has the stamp for you.


I started out by coloring Toadstool Fascination with Copics, with a little highlighting with a white gel pen. I trimmed the image and mounted her on Stampin’ Up! Buckaroo Blue and Early Espresso. My designer paper is from my stash, but I do know that I made the purchase from Hobby Lobby. There's a lot of layers and dimension going on.

Skin: E000, 00, 11, 13, BV000, Ro2, R20
Hair: E21, 25, 27, 29
Clothes & Birds: B32, 34, 37, 39, and
R02, 05, 08, 59
Mushrooms: R02, 05, 08, 59
Leaves: G40, 82, 85, 99
Background: W3, 2, 1, B32


Die cuts:
Spellbinder’s Classic Circles
Memory Box Fabulous Flox
Memory Box Kaleidoscope Butterfly
Stampin’ Up! Sizzlits Large Delicate Doilies
Cheery Lynn Fanciful Flourish

 Other supplies:
Viva Décor 3-D Stamp Paint: Metallic Lt. Blue & Walnut Brown
Distress Ink: Gathered Twigs
Pearls from my stash

This month at Sweet Peas challenge blog, One Sweet Challenge, our theme is “things that go bump in the night.” That’s a fun challenge and perfect for October. If you use a SPS stamp, rubber or digi, we would love to see you little piece of art at our SPSFacebook group. Want to know all the happenings at Sweet Pea, hop on over to our SPS Facebook page.

Thanks for stopping by. If you have any questions, please contact me.
Aletha Jane

I'm Moving!

I am moving my blog to my website at AJ's Design Artz . I hope you stop by!